GitHub Integration
The Cypress Dashboard can integrate your Cypress tests with your GitHub workflow via commit status checks and pull request comments. A project first needs to be setup to record to the Cypress Dashboard to use GitHub integration.
GitHub Enterprise
Premium Dashboard Feature
GitHub Enterprise integration is included in our Business and Enterprise paid pricing plans.
This integration is currently in Limited Preview. For more information about participating in this Limited Preview, please contact your Customer Success Manager.
To configure the Dashboard integration for your GitHub Enterprise site, first follow the instructions to install via organization integration settings below, then skip to Cypress GitHub Enterprise app installation, and finally enable integration for a project.
Install the Cypress GitHub app
Before you can enable GitHub integration for your Cypress projects, you must first install the Cypress GitHub App. You can start the GitHub App installation process via your organization's settings page or a project's settings page in the Cypress Dashboard.
Install via organization integration settings
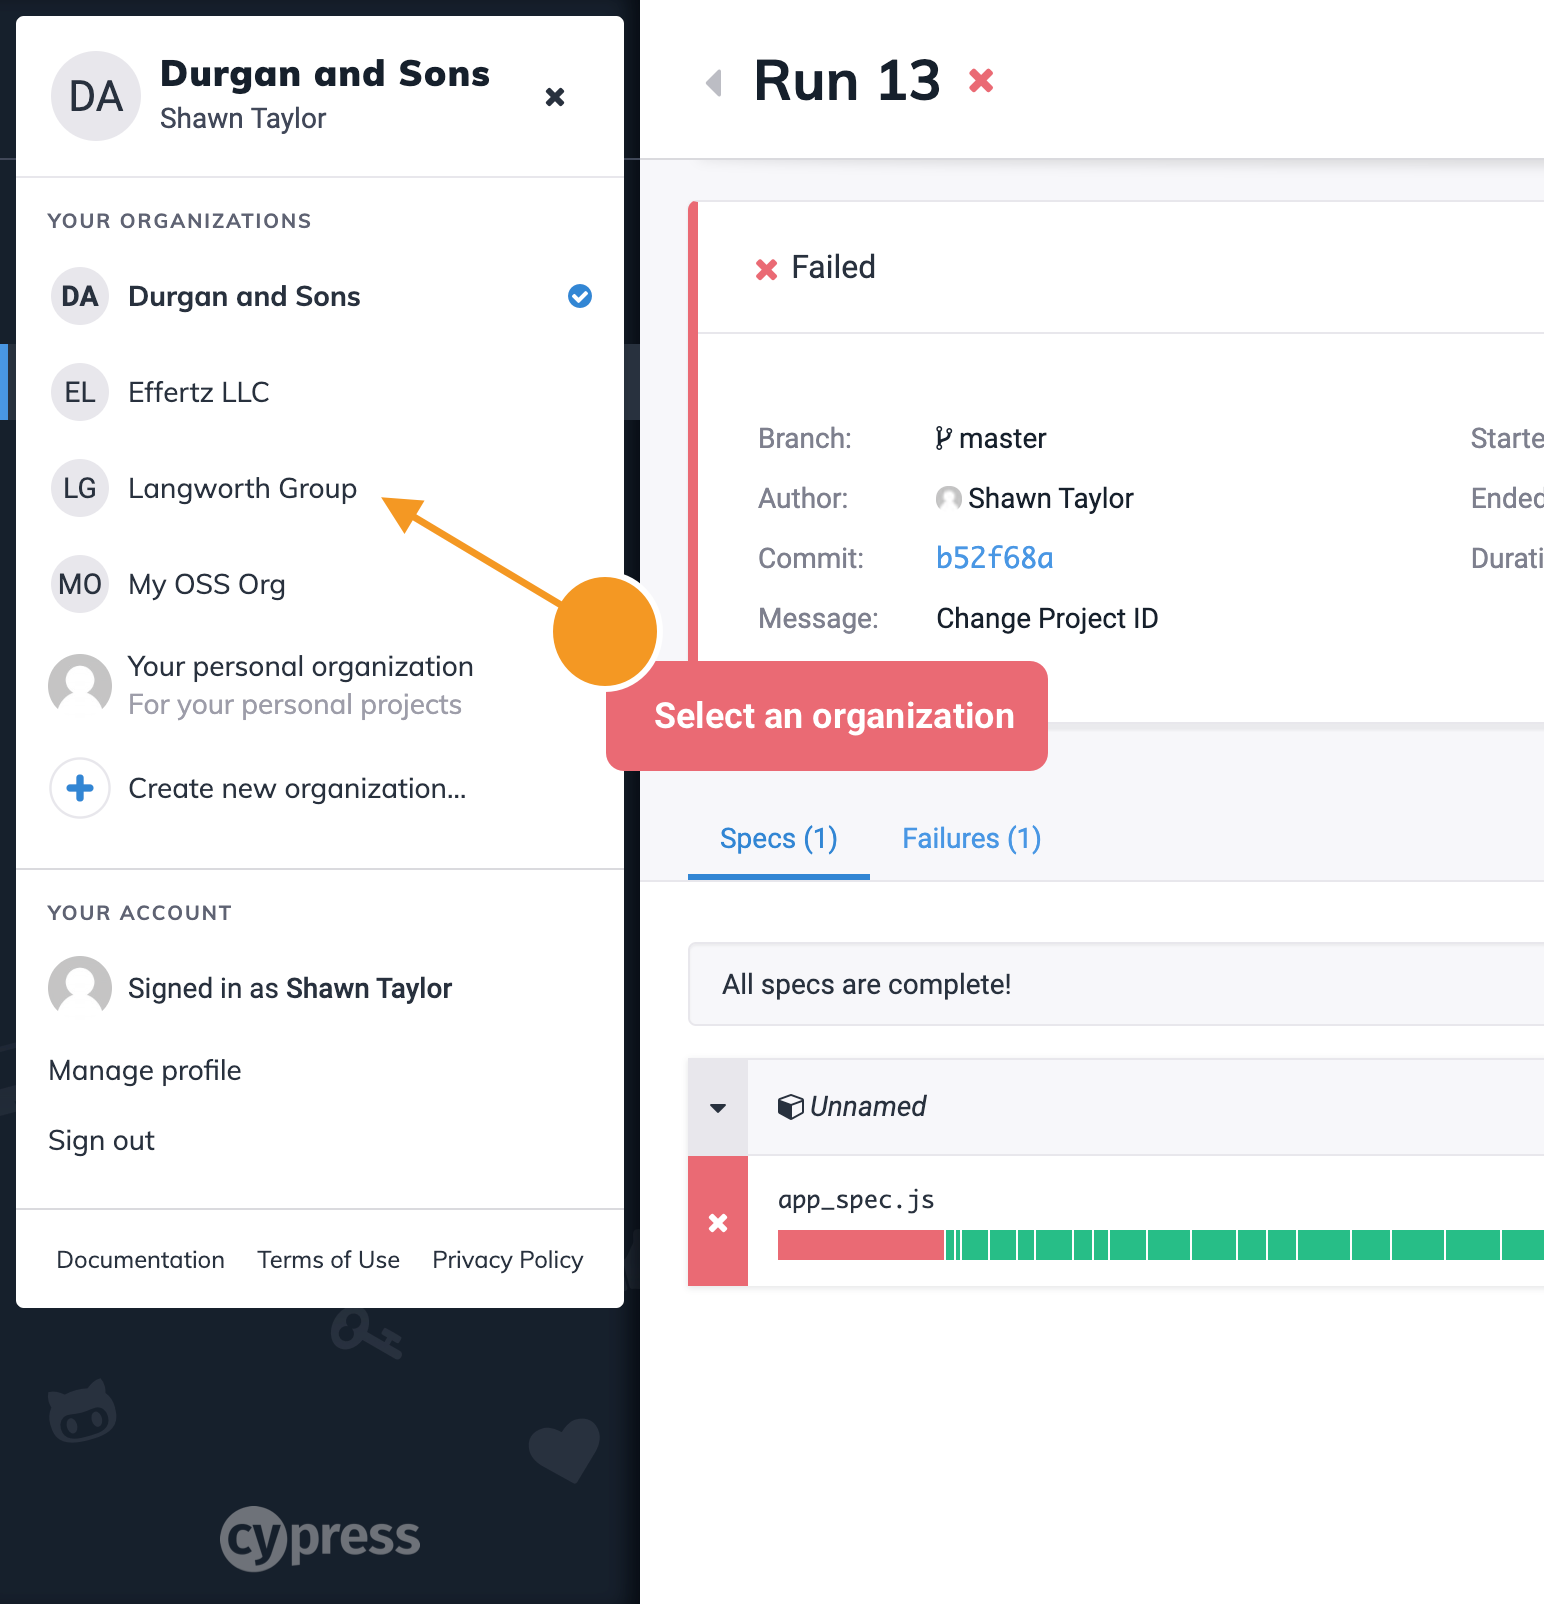
- Go to the Dashboard Organizations page or open the organization switcher.
- Select the organization you wish to integrate with a GitHub account or GitHub
organization.
- Visit the selected organization's Integrations page via the side
navigation.
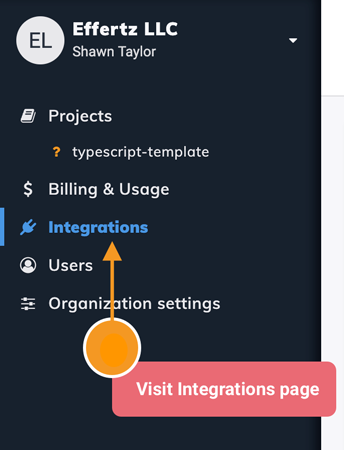
- Click the Install GitHub Integration or Install GitHub Enterprise Integration button.
Install via project settings
- Select your organization in the organization switcher.

- Select the project you wish to integrate with a GitHub repository.
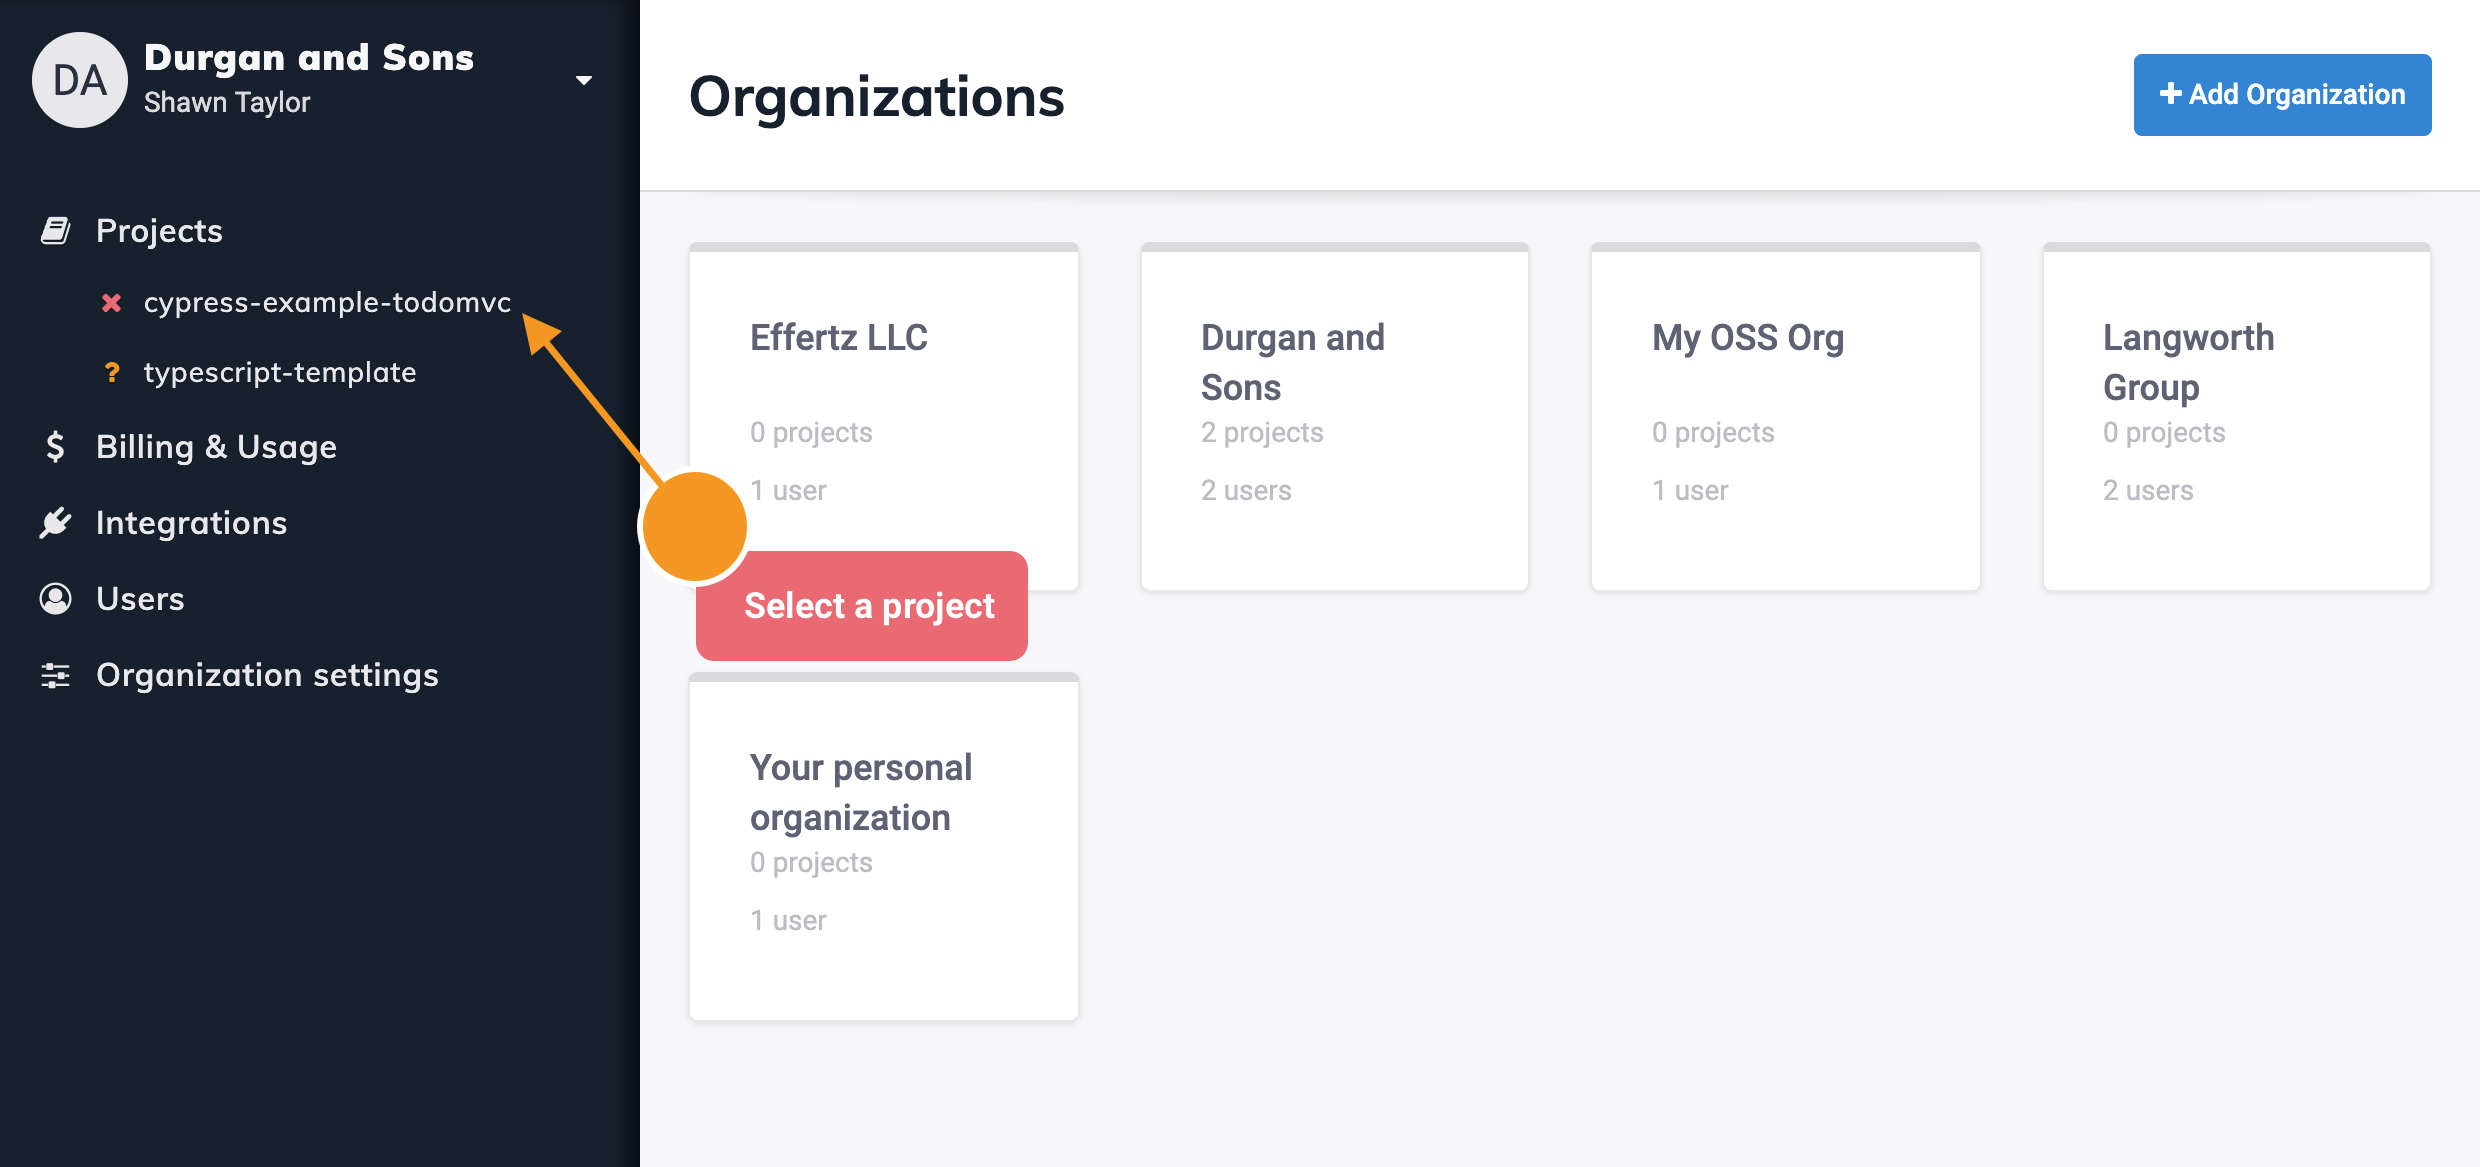
- Go to the project's settings page.

- Scroll down to the GitHub Integration section.
- Click the Install the Cypress GitHub App button.
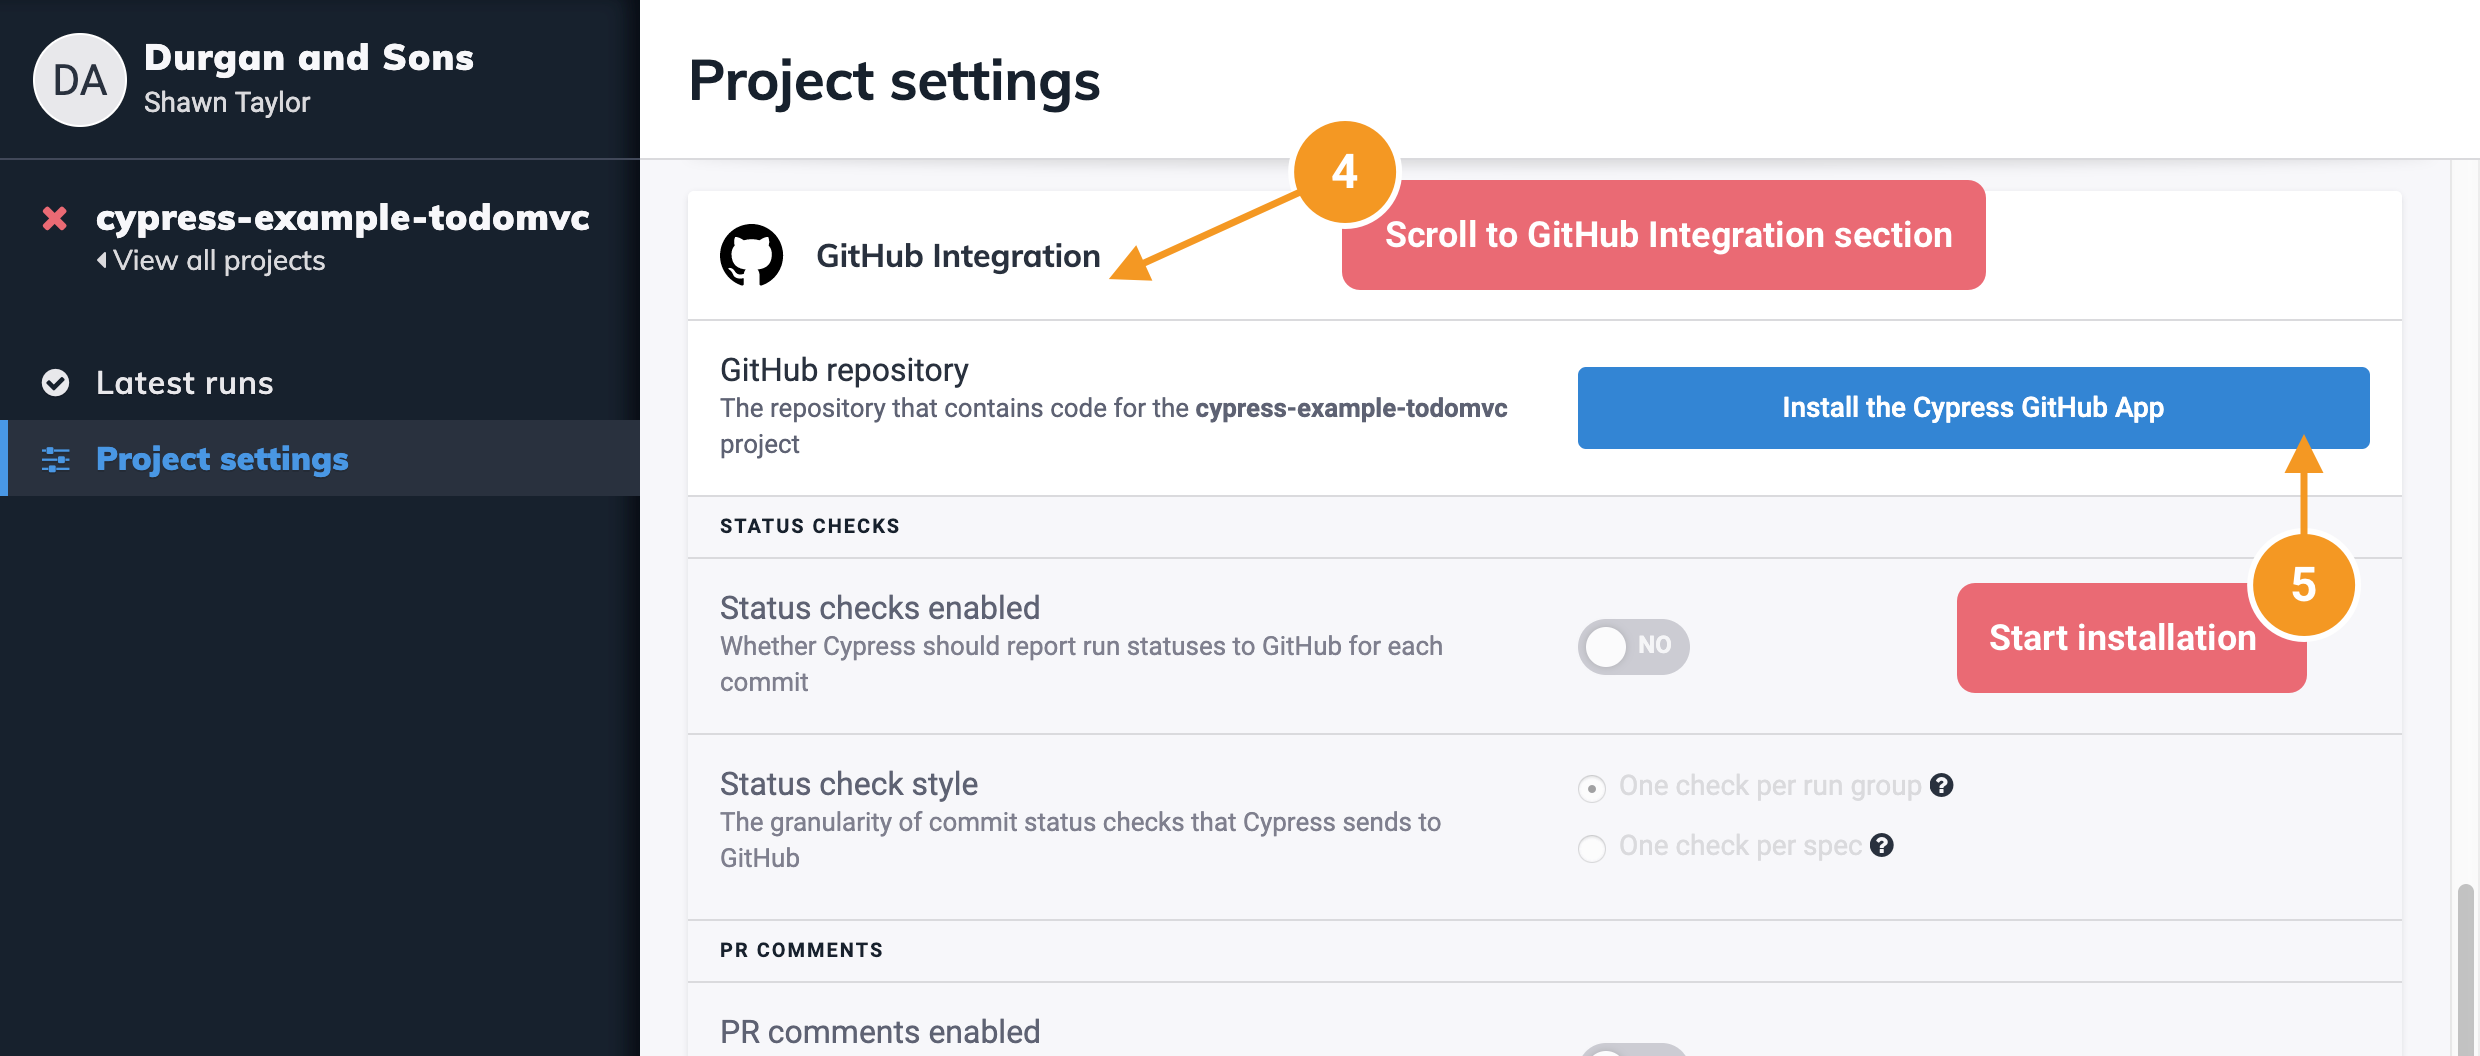
Cypress GitHub app installation process
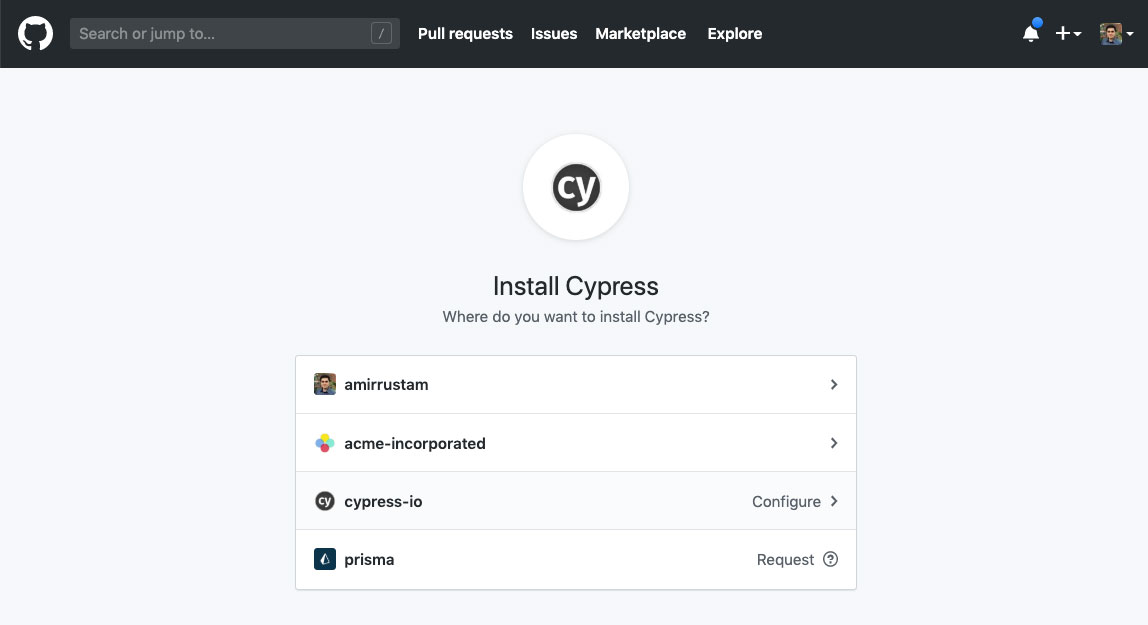
Once you've started the GitHub App installation process via a Cypress organization's settings or a project's settings, you will be directed to GitHub.com to complete the installation:
-
Select the desired GitHub organization or account to integrate with your Cypress Dashboard organization.
-
Choose to associate All repositories or only select GitHub repositories with your Cypress GitHub App installation.
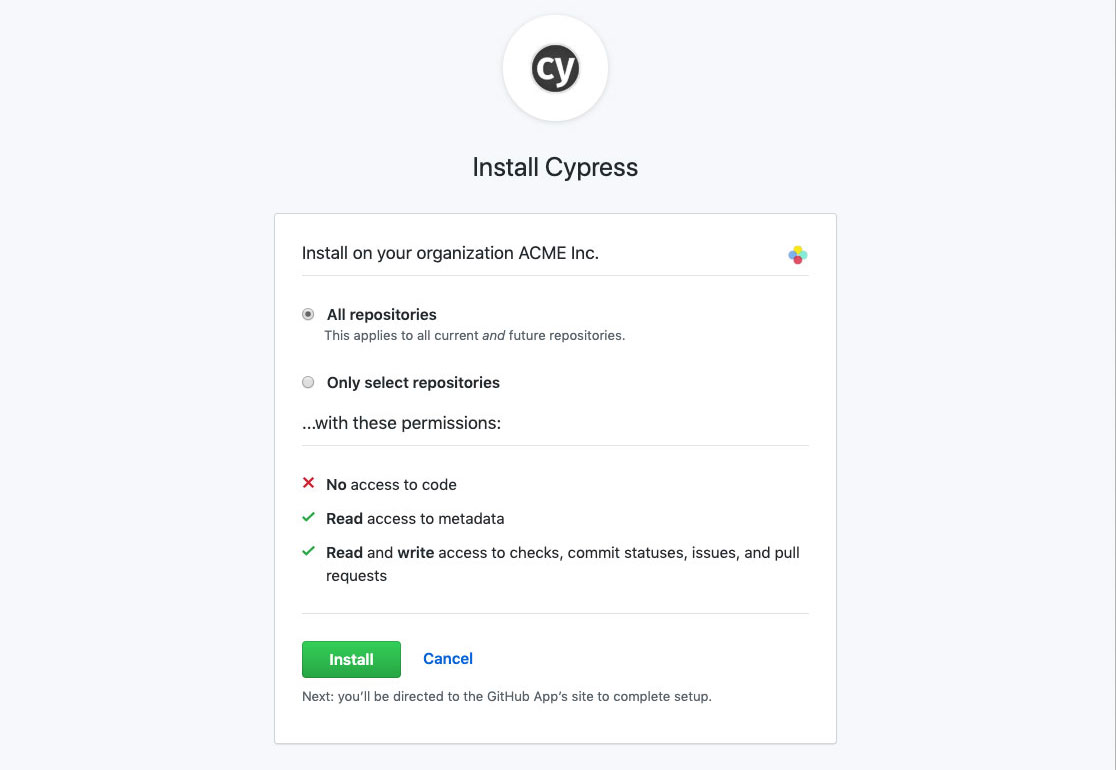
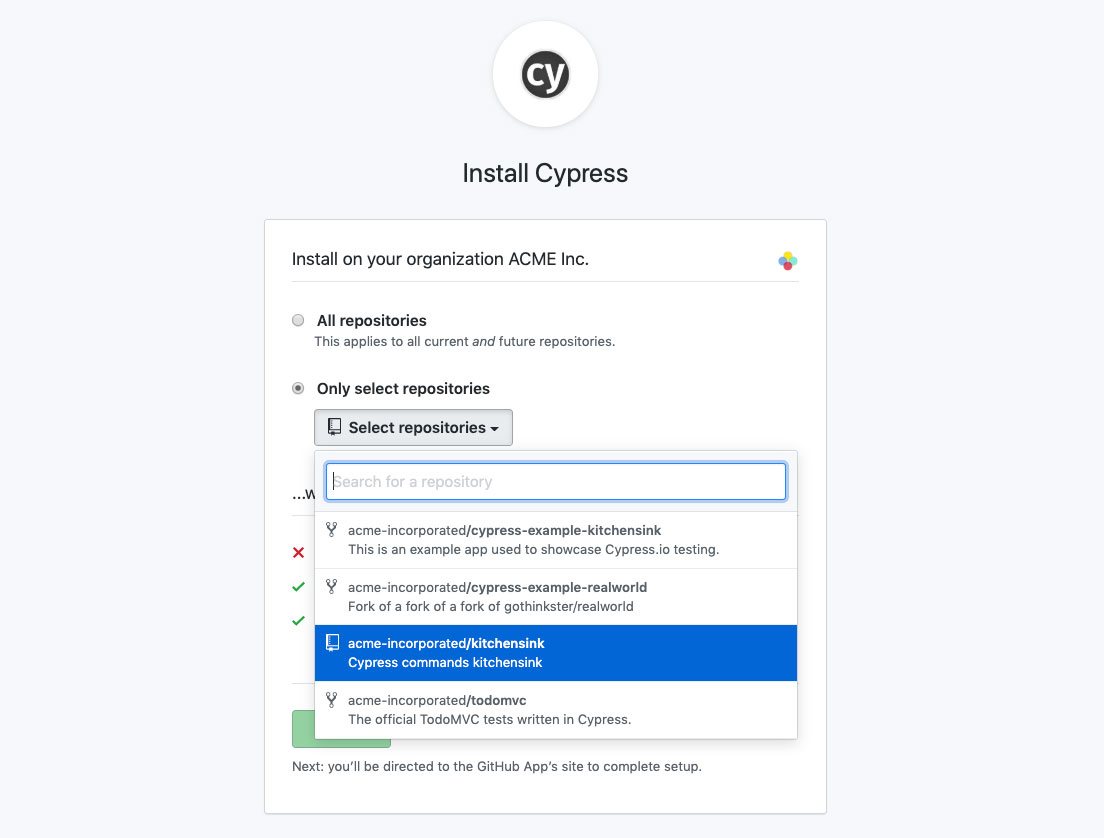
- Click the Install button to complete the installation.
Cypress GitHub Enterprise app installation process
To integrate the Dashboard with GitHub Enterprise, you need to create a new GitHub App, copy the necessary settings and credentials from the new app, paste them into the Dashboard, and complete the activation process.
- With your Dashboard organization's GitHub Enterprise page open, open a new tab or browser window and browse to your GitHub Enterprise site. Navigate to your GitHub organization → Settings → Developer settings → GitHub Apps. Do NOT go to OAuth Apps. Click the New GitHub App button.

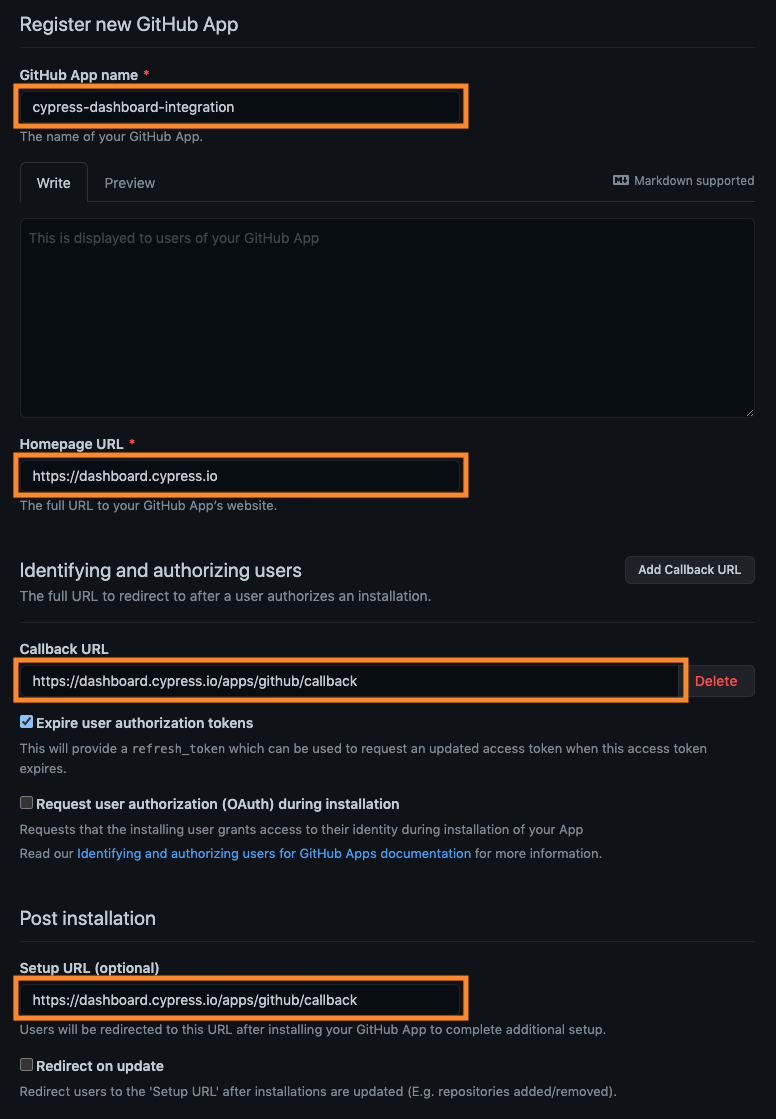
- Complete the Register new GitHub app section.
- Enter a GitHub App name. Name may contain only dashes, letters and numbers, no spaces.
- Enter the Cypress Dashboard Homepage URL, https://dashboard.cypress.io
- Enter the Callback URL and Setup URL, https://dashboard.cypress.io/apps/github/callback
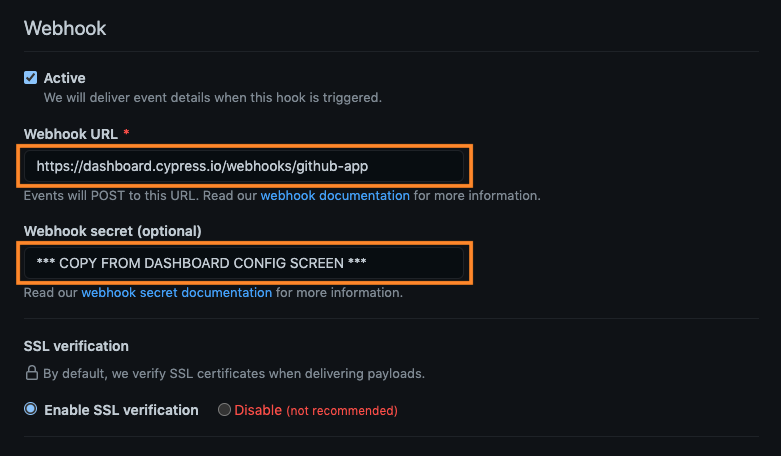
- Complete the Webhook section.
- Enter the Webhook URL, https://dashboard.cypress.io/webhooks/github-app
- Copy and paste the provided Webhook secret from your Cypress Dashboard to Webhook secret (optional).
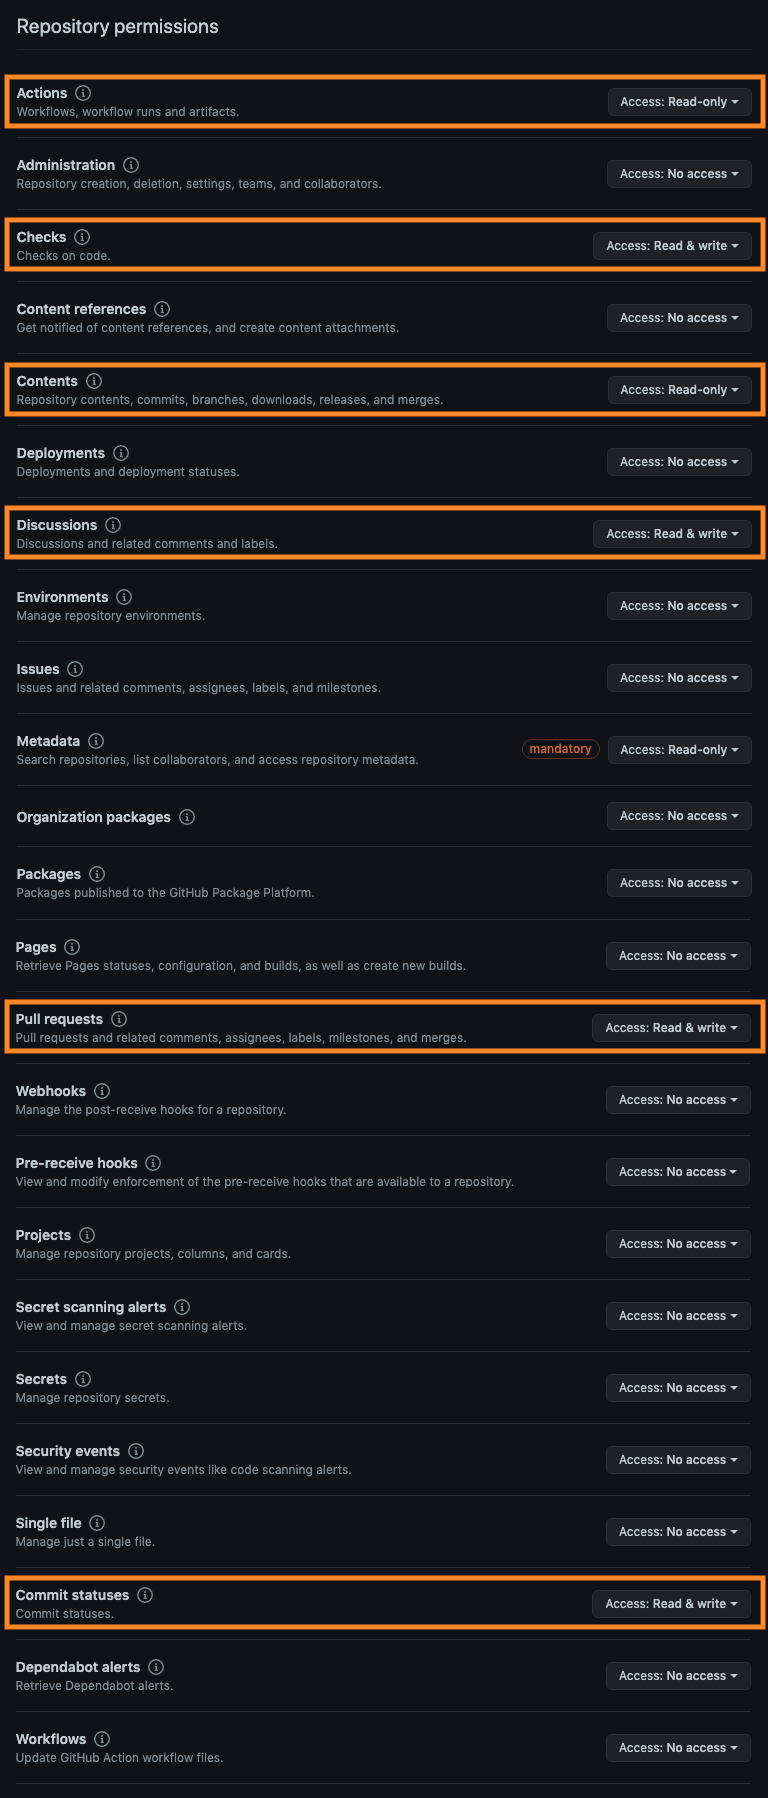
- Set the Repository Permissions. Below are the minimum permissions
required for the new GitHub App.
- Actions: read-only
- Checks: read & write
- Contents: read-only
- Discussions: read & write
- Pull requests: read & write
- Commit statuses: read & write
-
Skip to the bottom of the form and click the Create GitHub App button. Your new GitHub App is now created, and you'll be taken to the settings page.
-
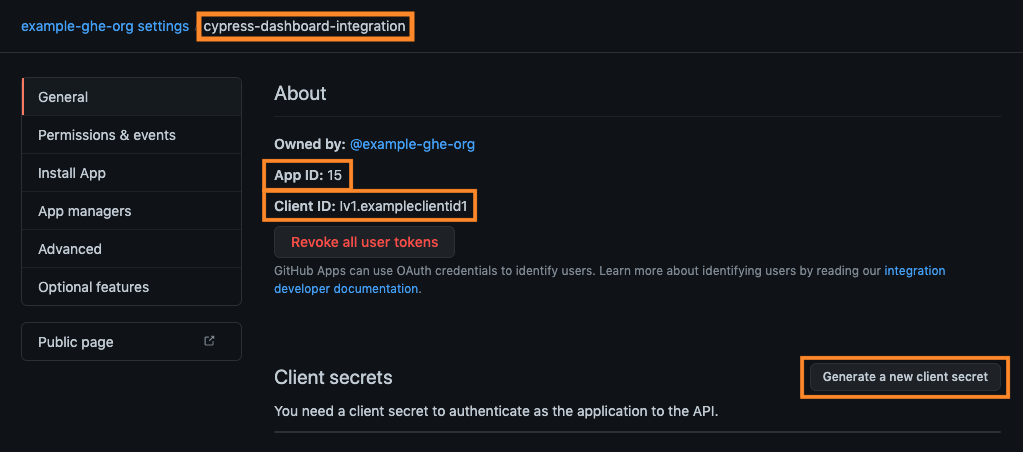
Returning to the Cypress Dashboard GitHub Enterprise Integration configuration screen, populate the following values from your new GitHub App.
- Copy the root URL of your GitHub Enterprise site to the Cypress GitHub Enterprise Server URL field.
- Copy the App ID to the Cypress GitHub Enterprise App ID field.
- Copy the Client ID to the Cypress GitHub Enterprise Client ID field.
- Copy the GitHub App name to the Cypress GitHub Enterprise App name field.
- Generate a new Client secret in GitHub by clicking on the Generate a new client secret button. Copy the new secret into the Cypress GitHub Enterprise Client secret field.
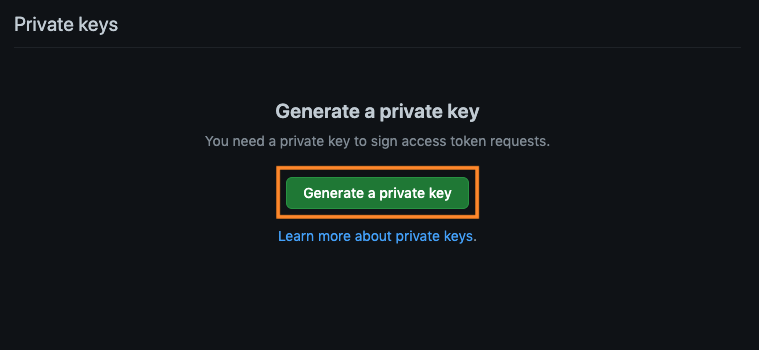
- Generate a new private key in GitHub by clicking on the Generate a private key button. Open in a text editor and copy all of the content into the Cypress GitHub Enterprise Private key field.

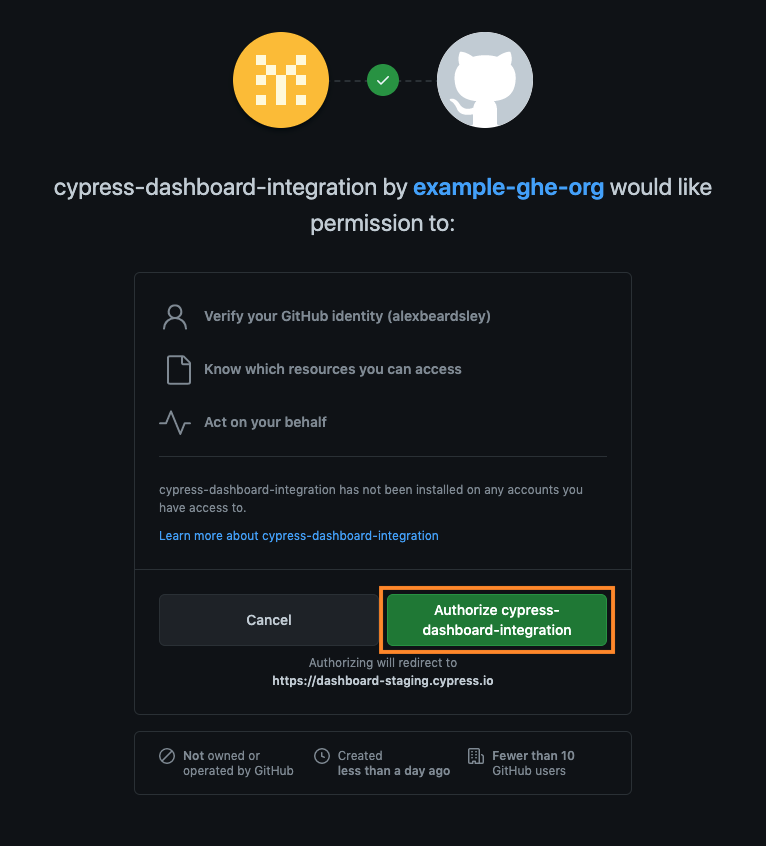
- In the Cypress Dashboard, click the Next Step button and you will be taken to the GitHub Enterprise app authorization page. Click the Authorize [your app name] button.
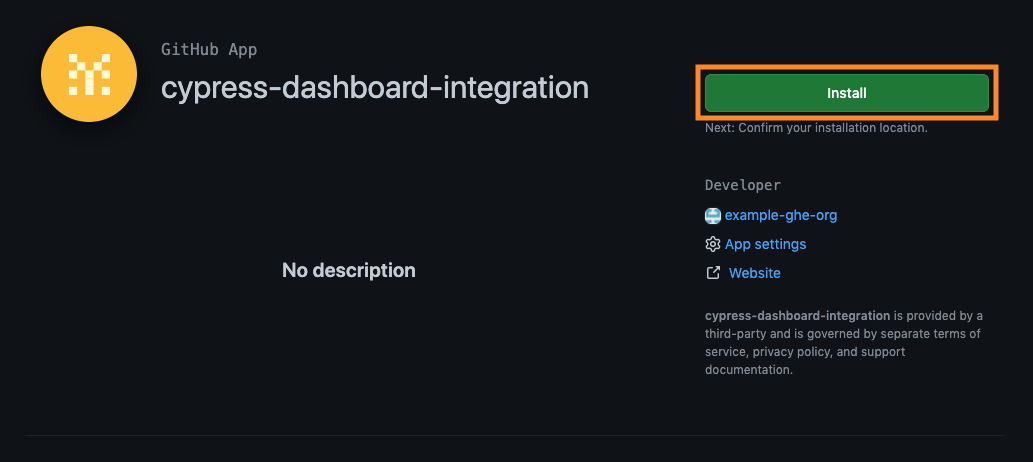
- On your newly-authorized GitHub App, click the Install button.
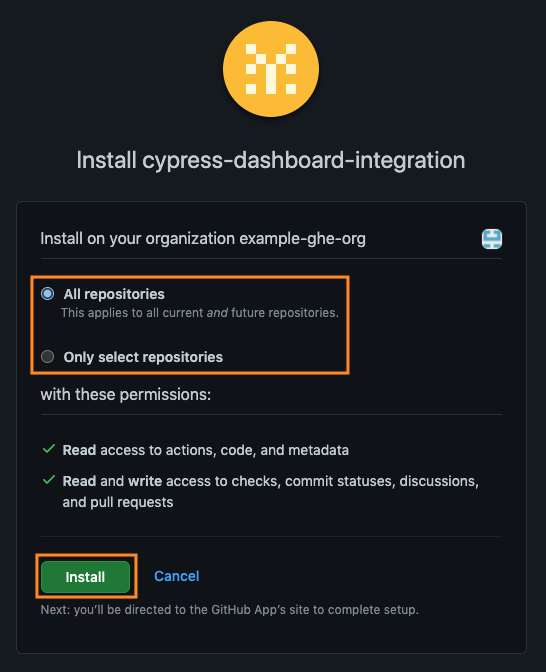
- Nearly there! On the GitHub App installation page, choose whether you want to install the app against all repos or select specific ones, then click the Install button.
- Finally you will be returned to the Dashboard. Congratulations, you have installed the Cypress Dashboard GitHub Enterprise integration! You are now ready to configure a GitHub Integration for a project.
Enabling GitHub integration for a project
After completing the Cypress GitHub App installation for your organization you can now enable GitHub Integration for any Cypress project.
-
Go to the project's settings page.

-
Scroll down to the GitHub Integration or GitHub Enterprise Integration section.
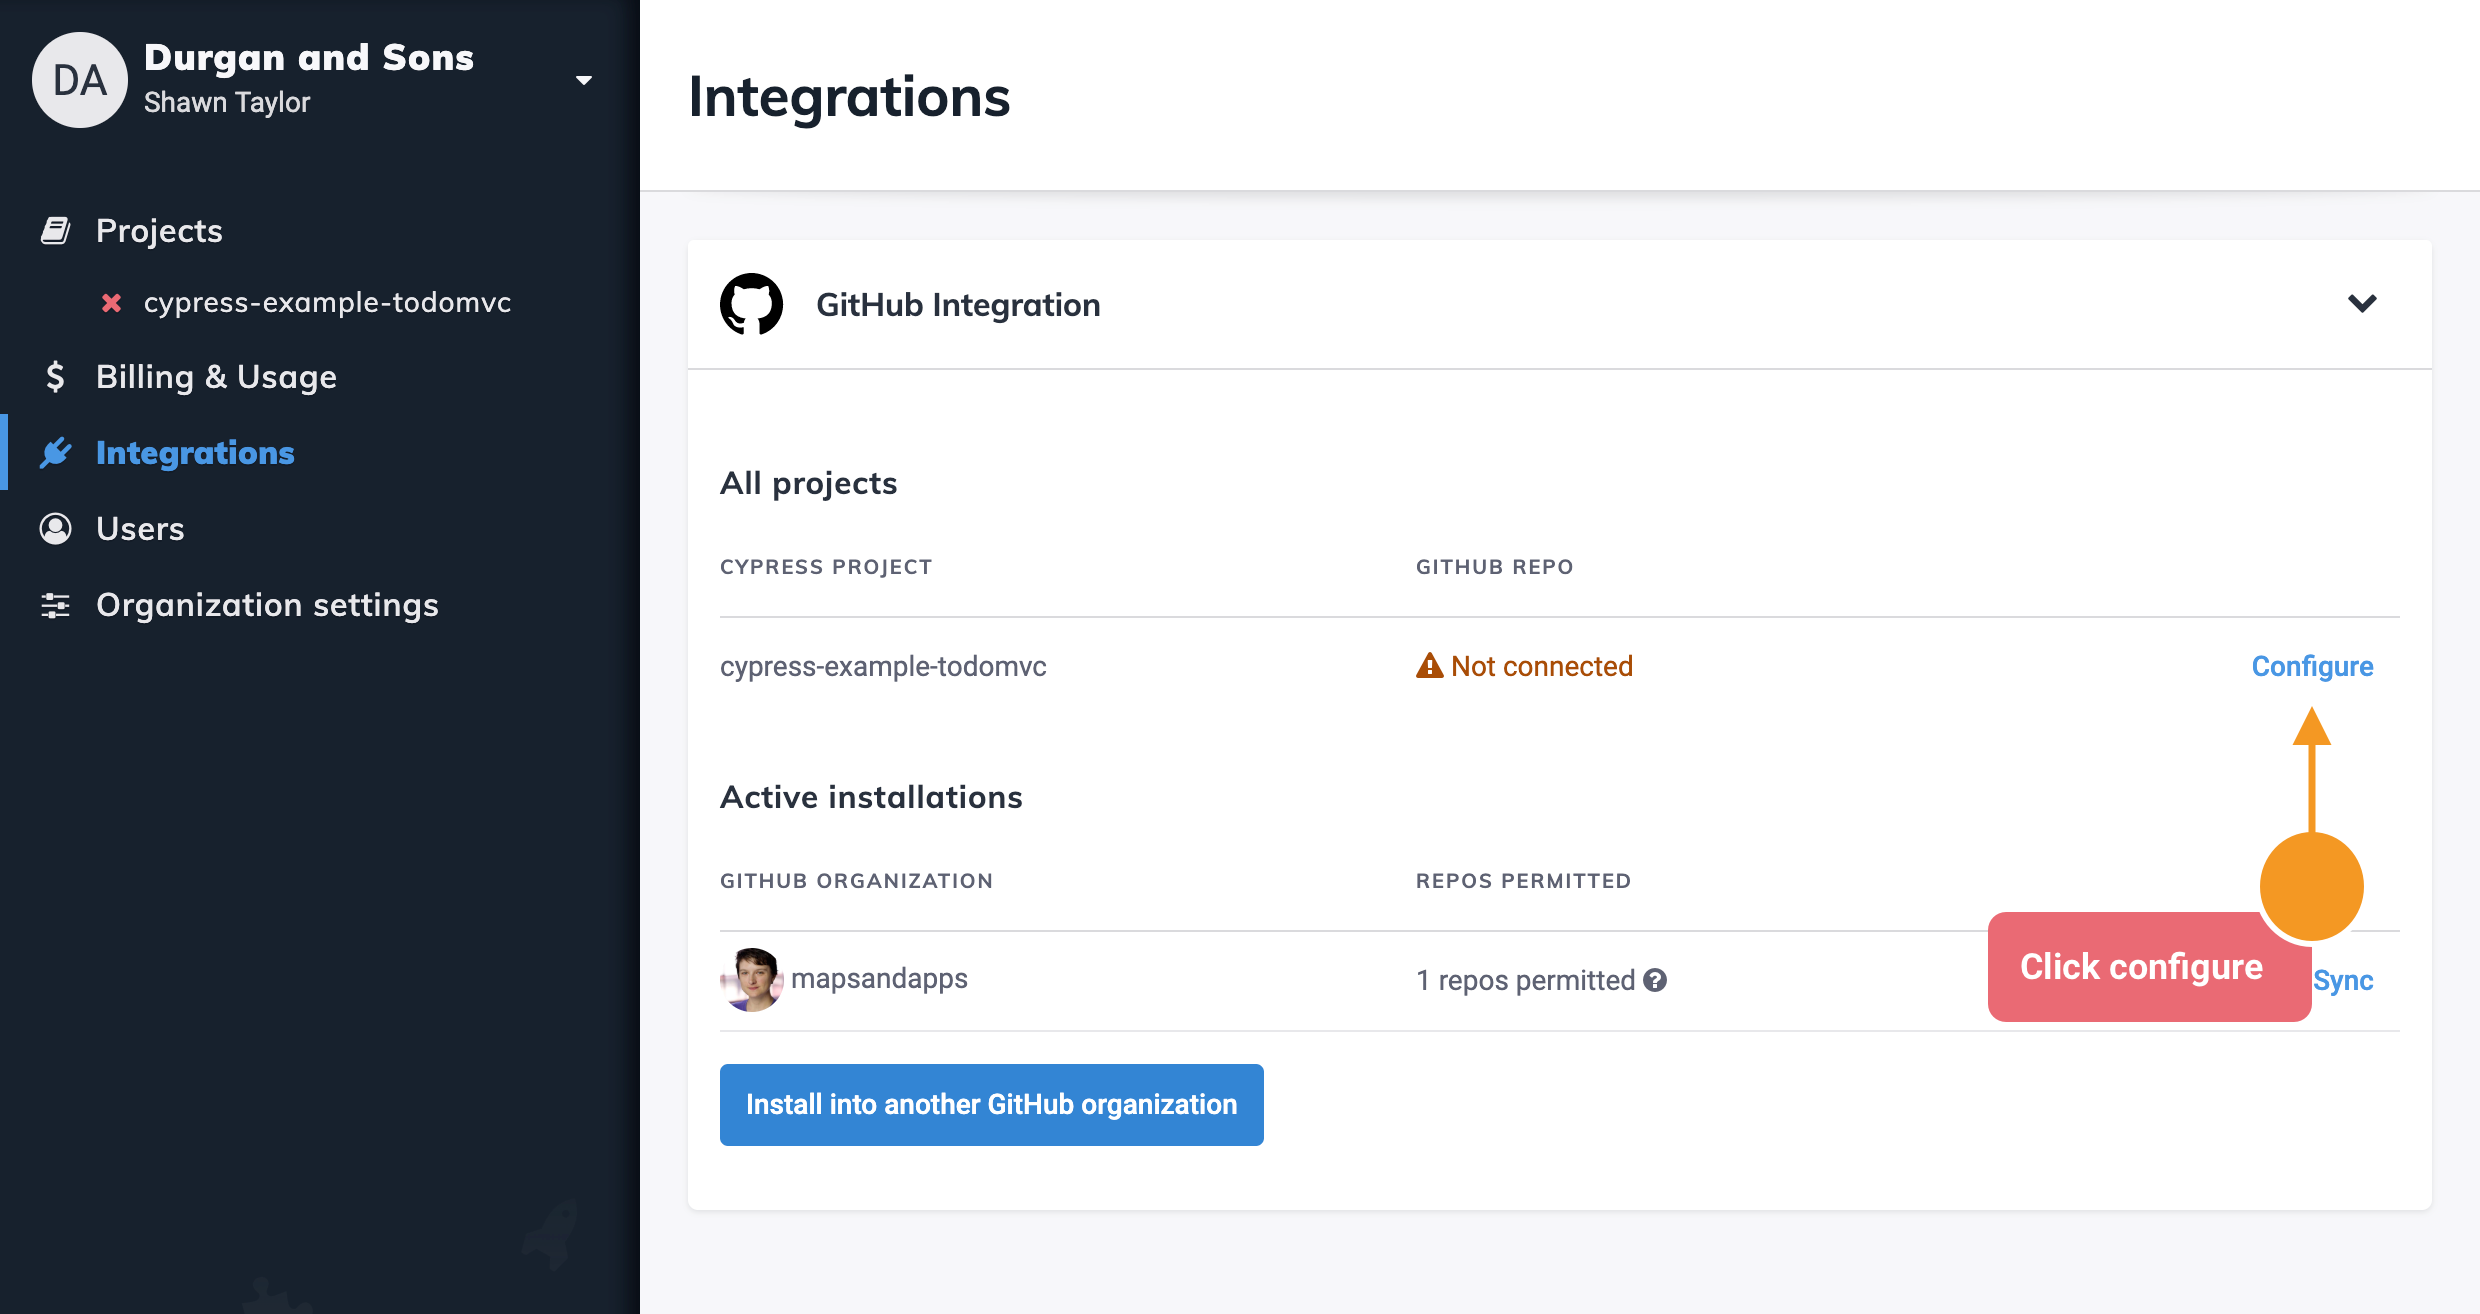
- Select a GitHub repository to associate with the project.
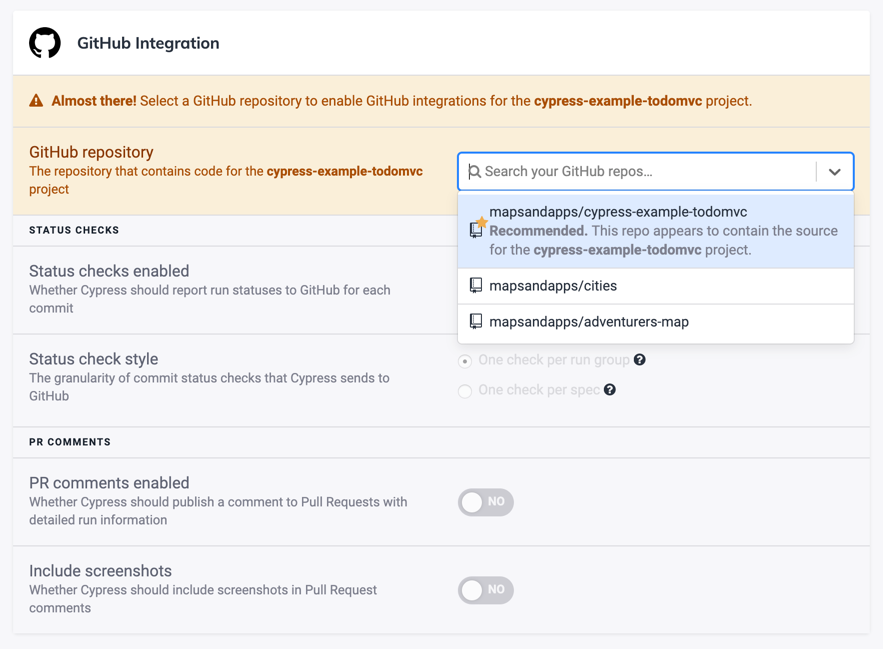
Once a GitHub repository is associated with a Cypress project, the GitHub
integration will be immediately enabled:
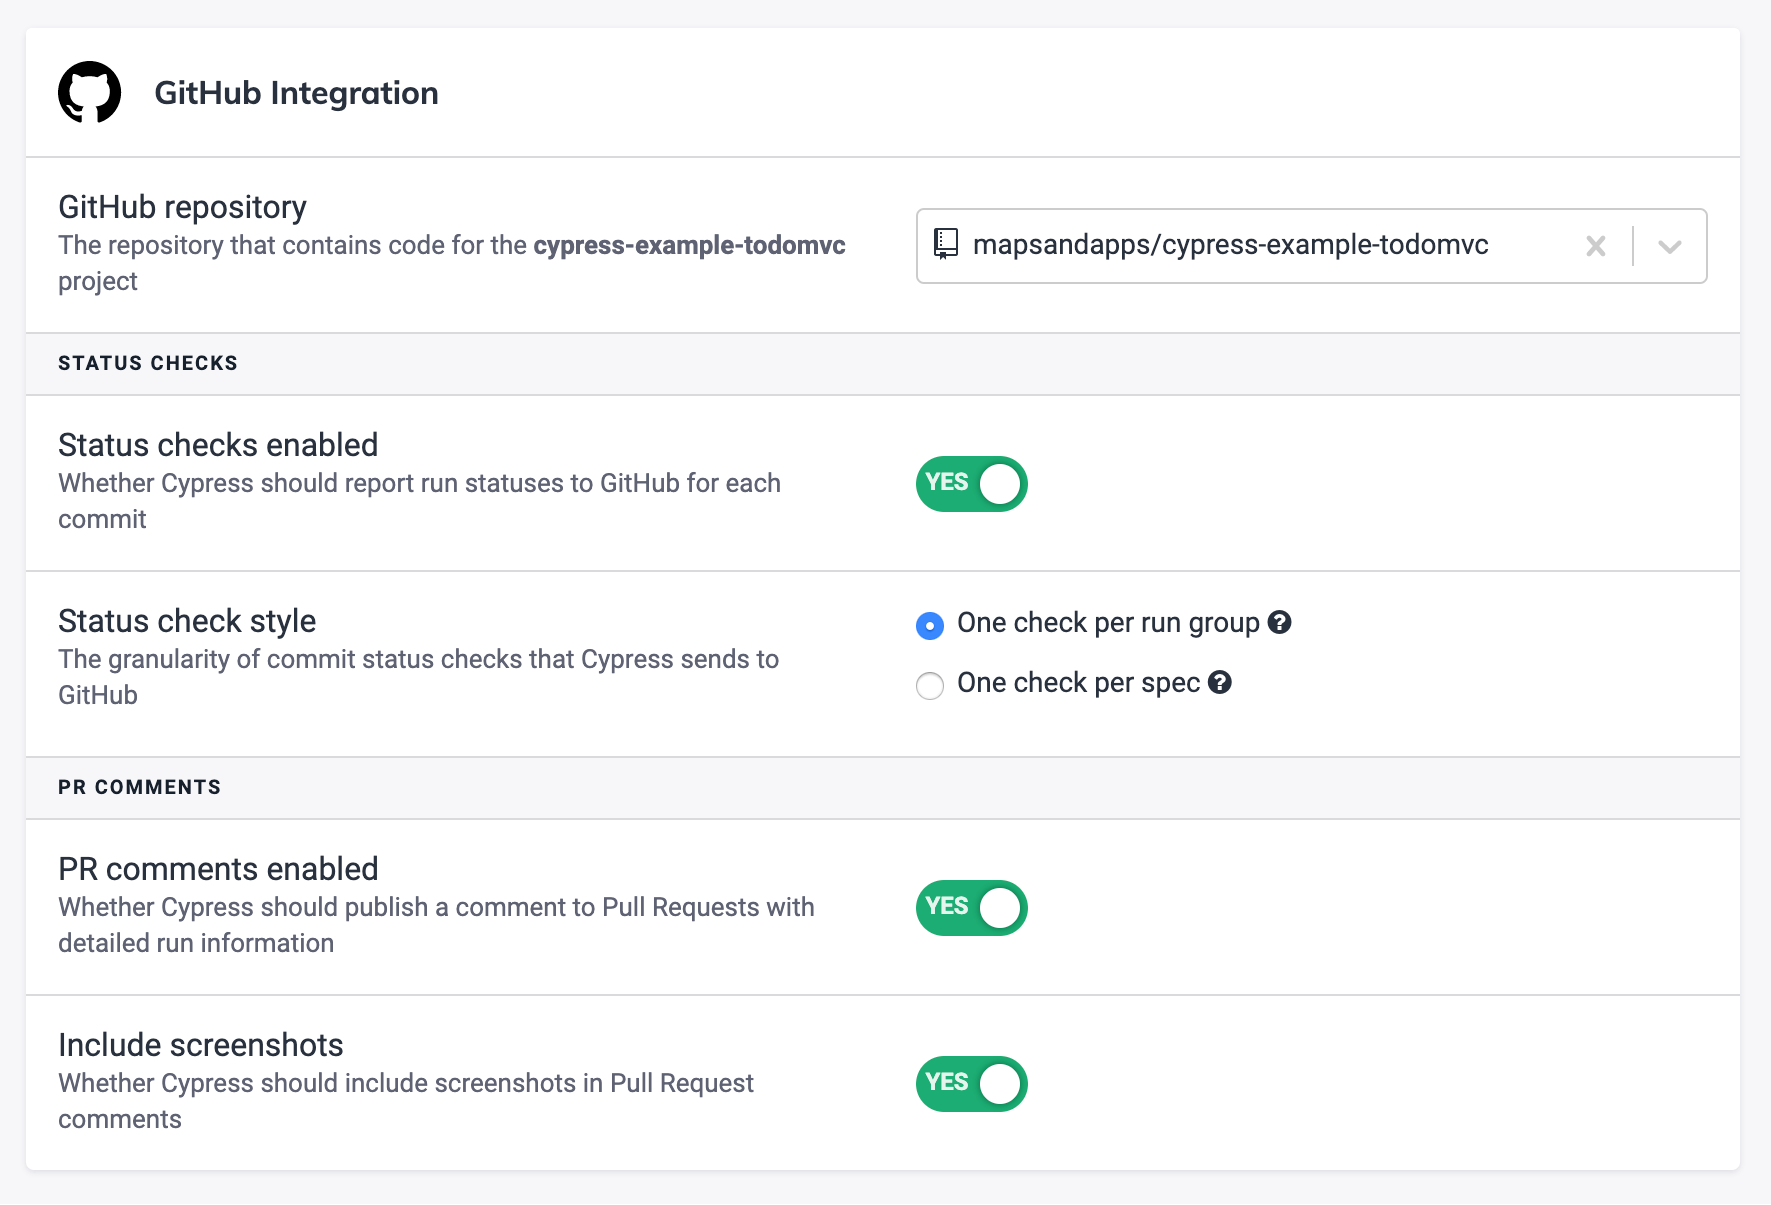
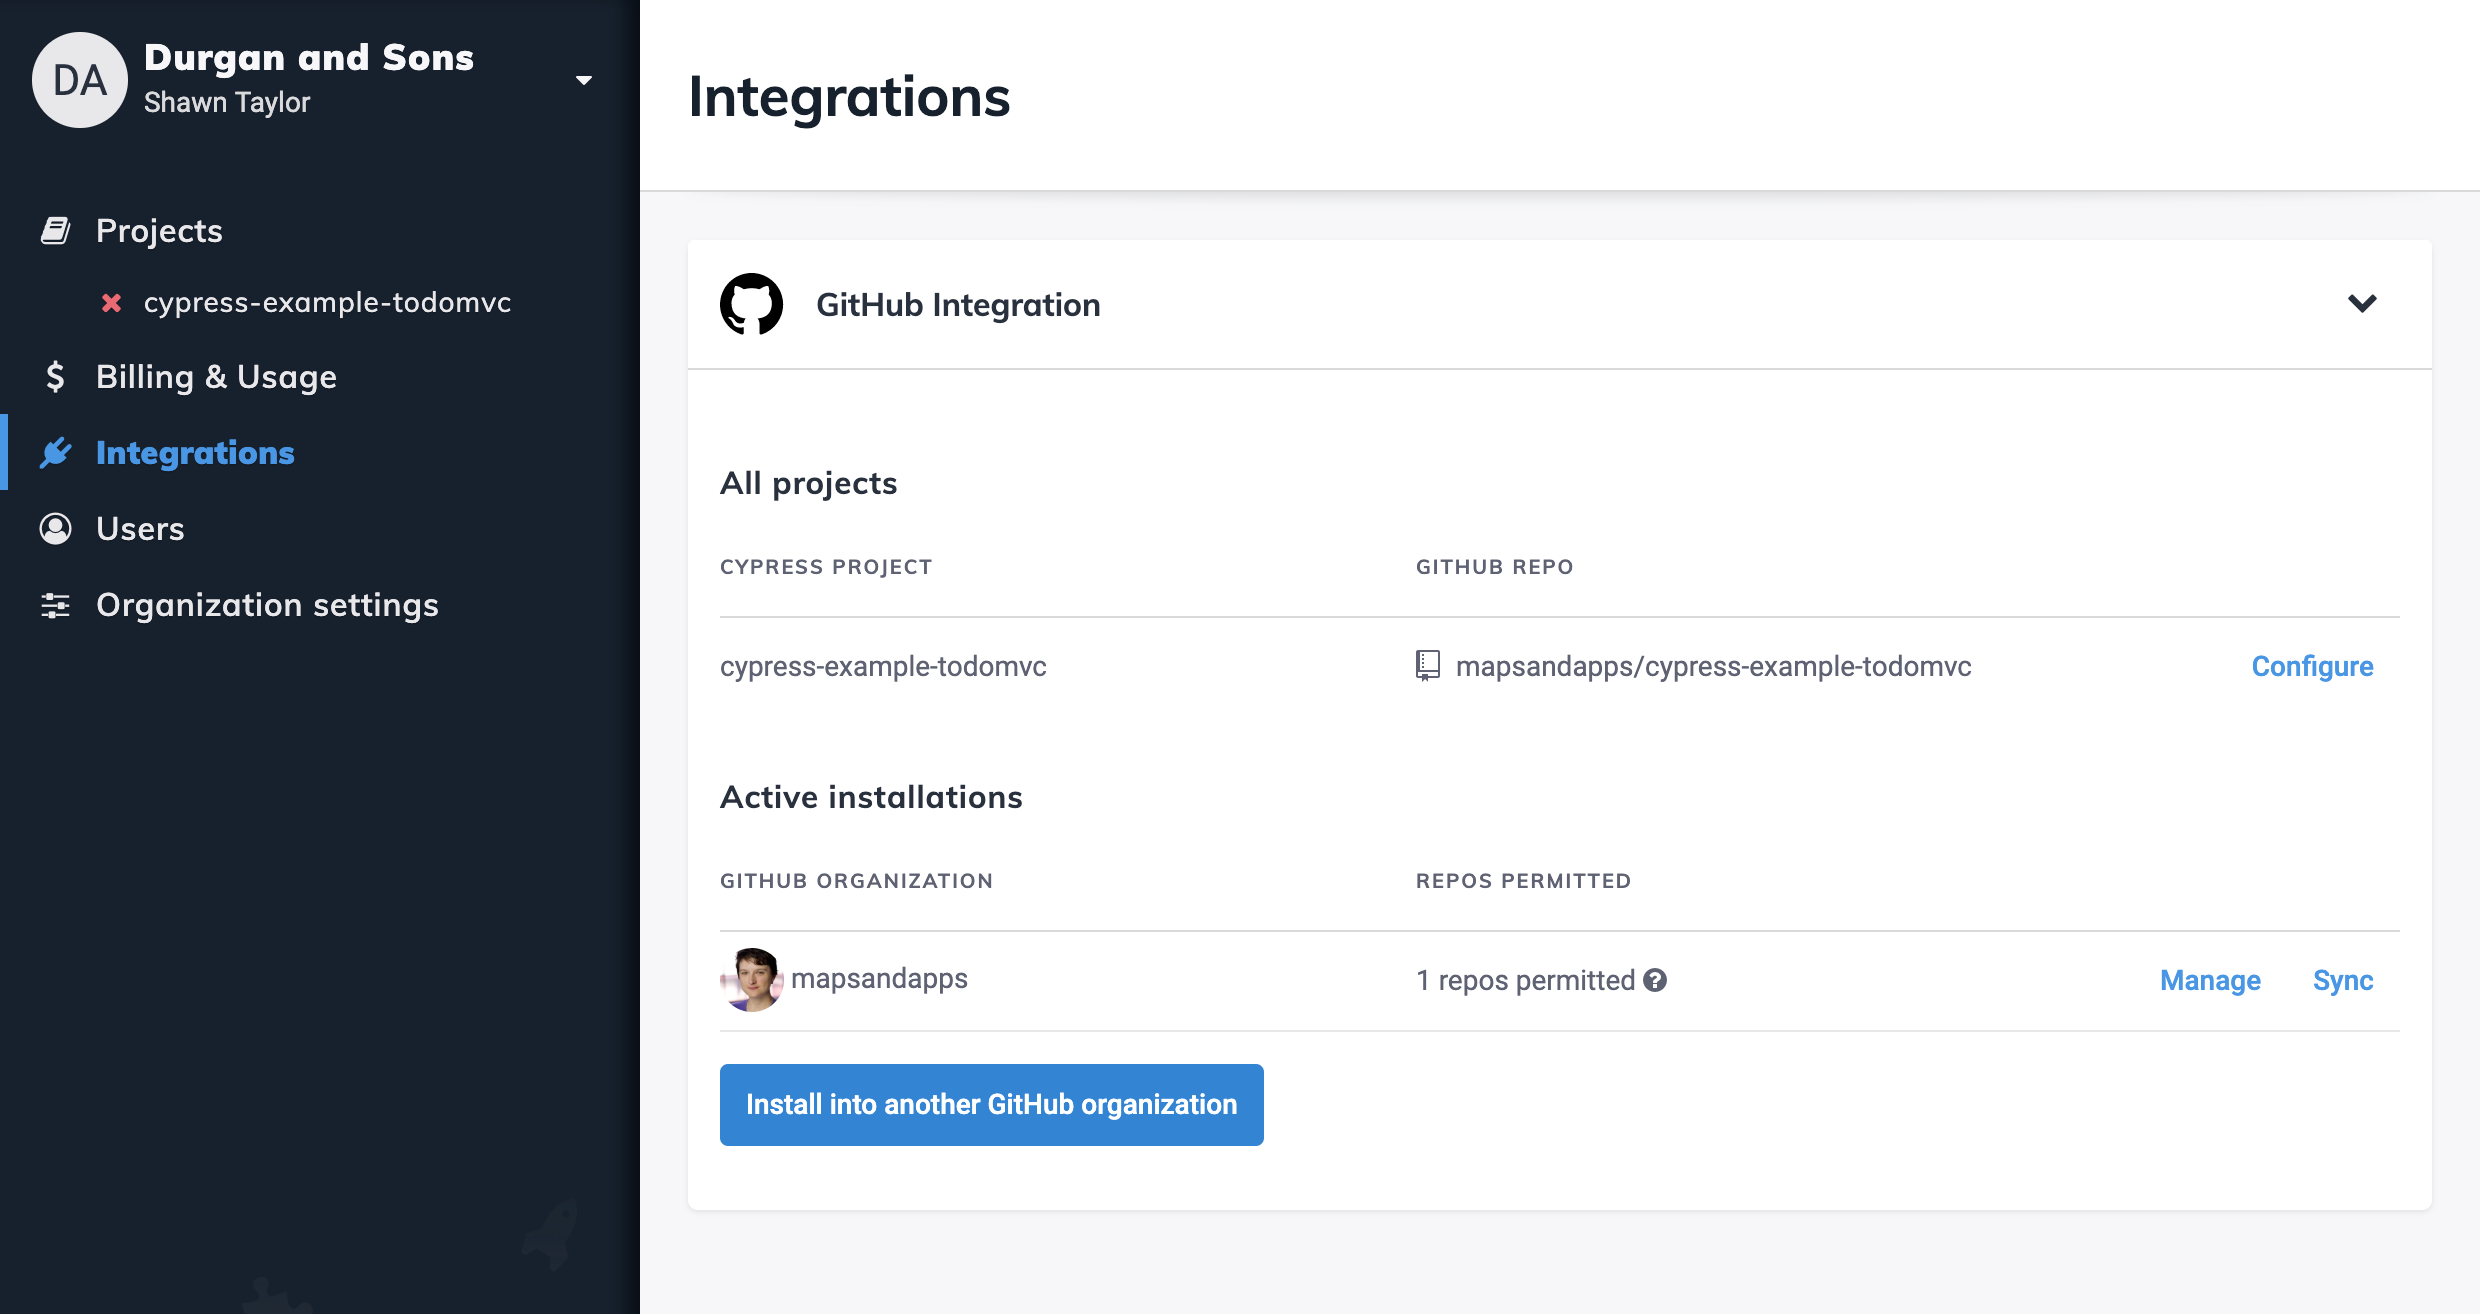
You can also see all GitHub Integration enabled Cypress projects within your
organizations Integrations page:
Status checks
If status checks are enabled within a project's GitHub integration settings, the Cypress Dashboard will report Cypress test statuses to GitHub for related commits. Status checks help prevent merging a commit or pull-request into the rest of your codebase until all your Cypress tests have passed.
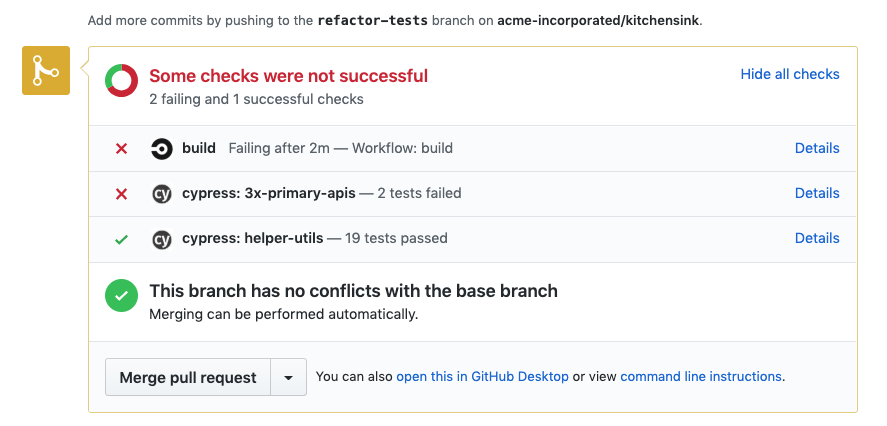
The Cypress GitHub App reports commit status checks in two separate styles:
-
One check per run group.
-
Or one check per spec file.
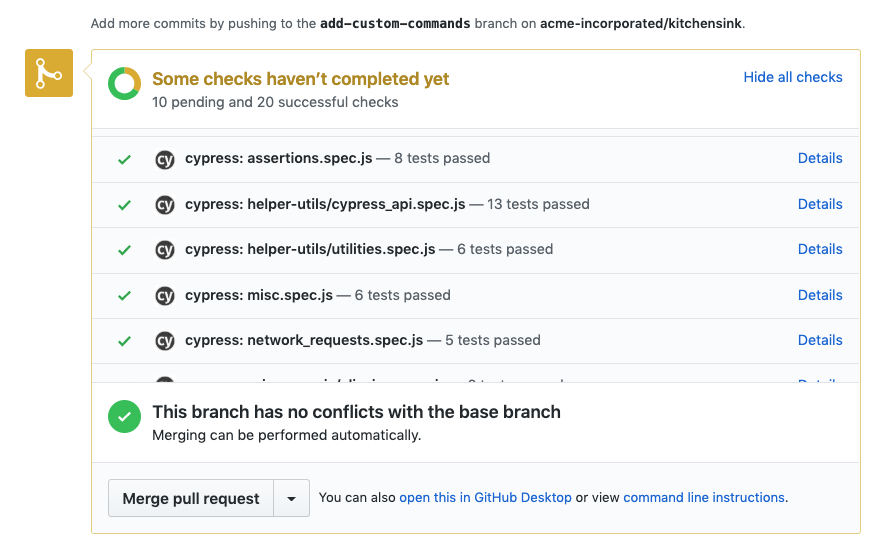
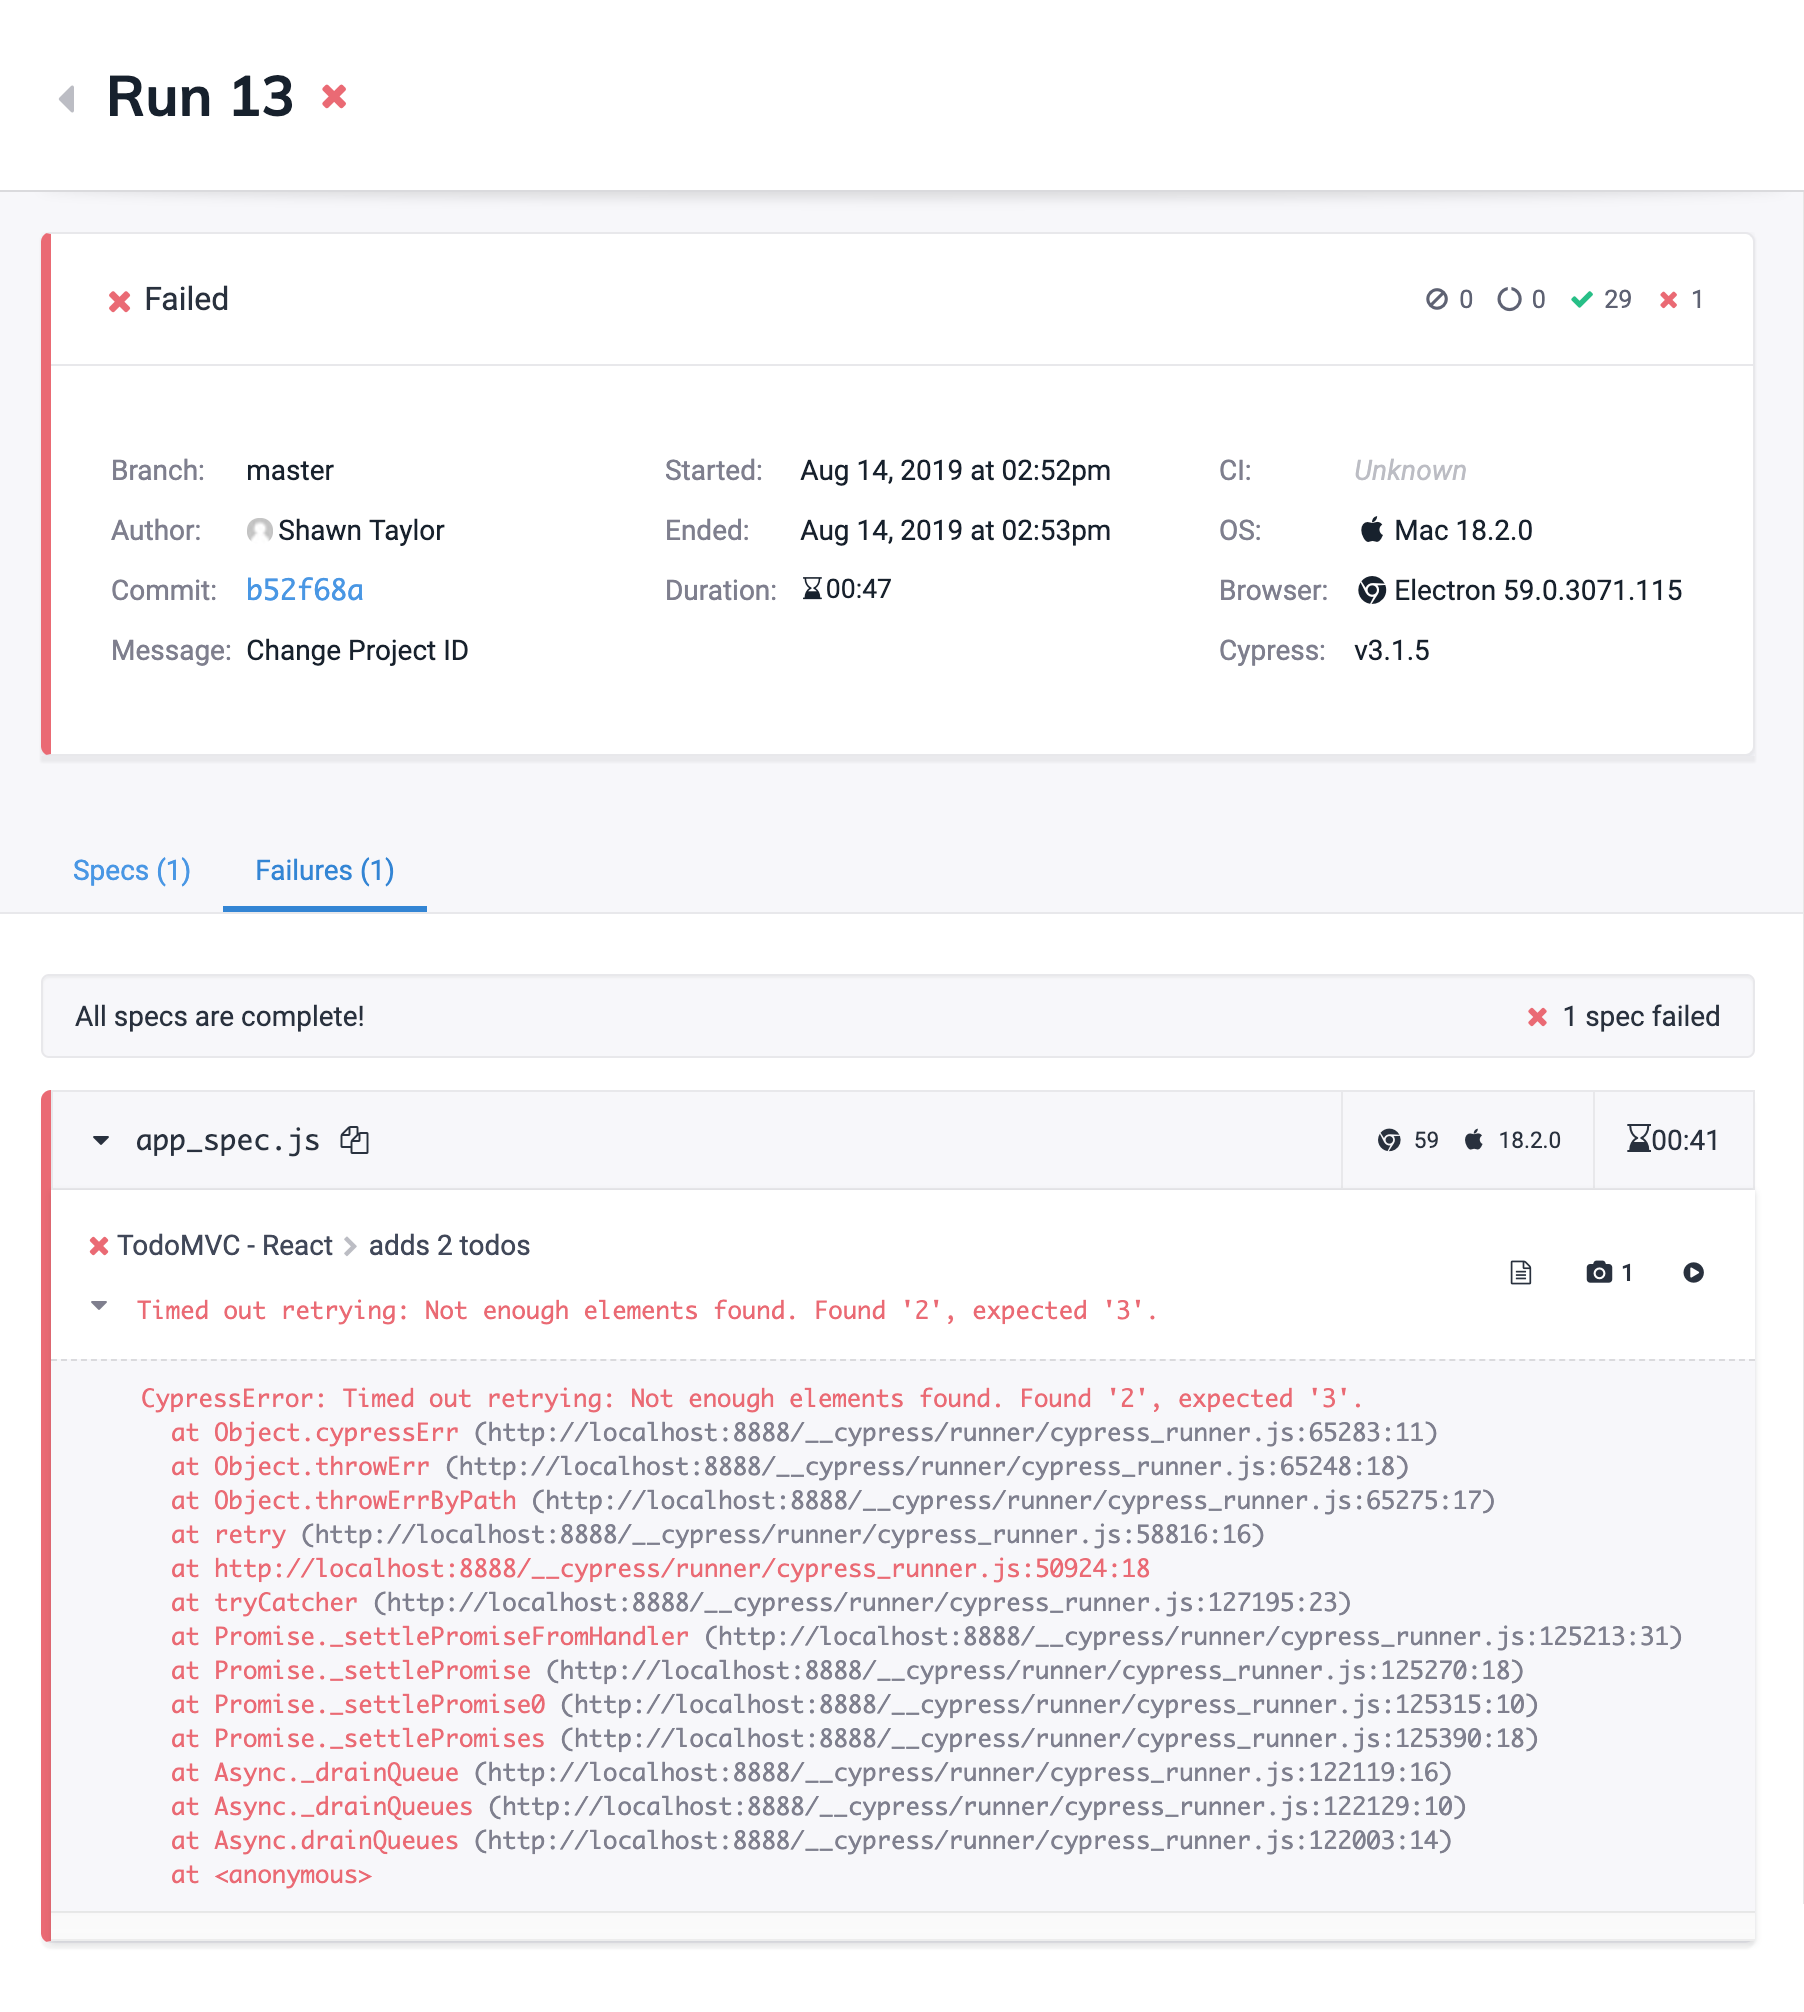
Each status check will report the number of test failures or passes, and the
associated Details link will direct you to the test run's page within the
Cypress Dashboard to help you dig deeper into the problem via error messages,
stack traces, screenshots, and video recordings:
Disable status checks
GitHub status checks are optional, and can be disabled within a project's GitHub
integration settings:

Pull request comments
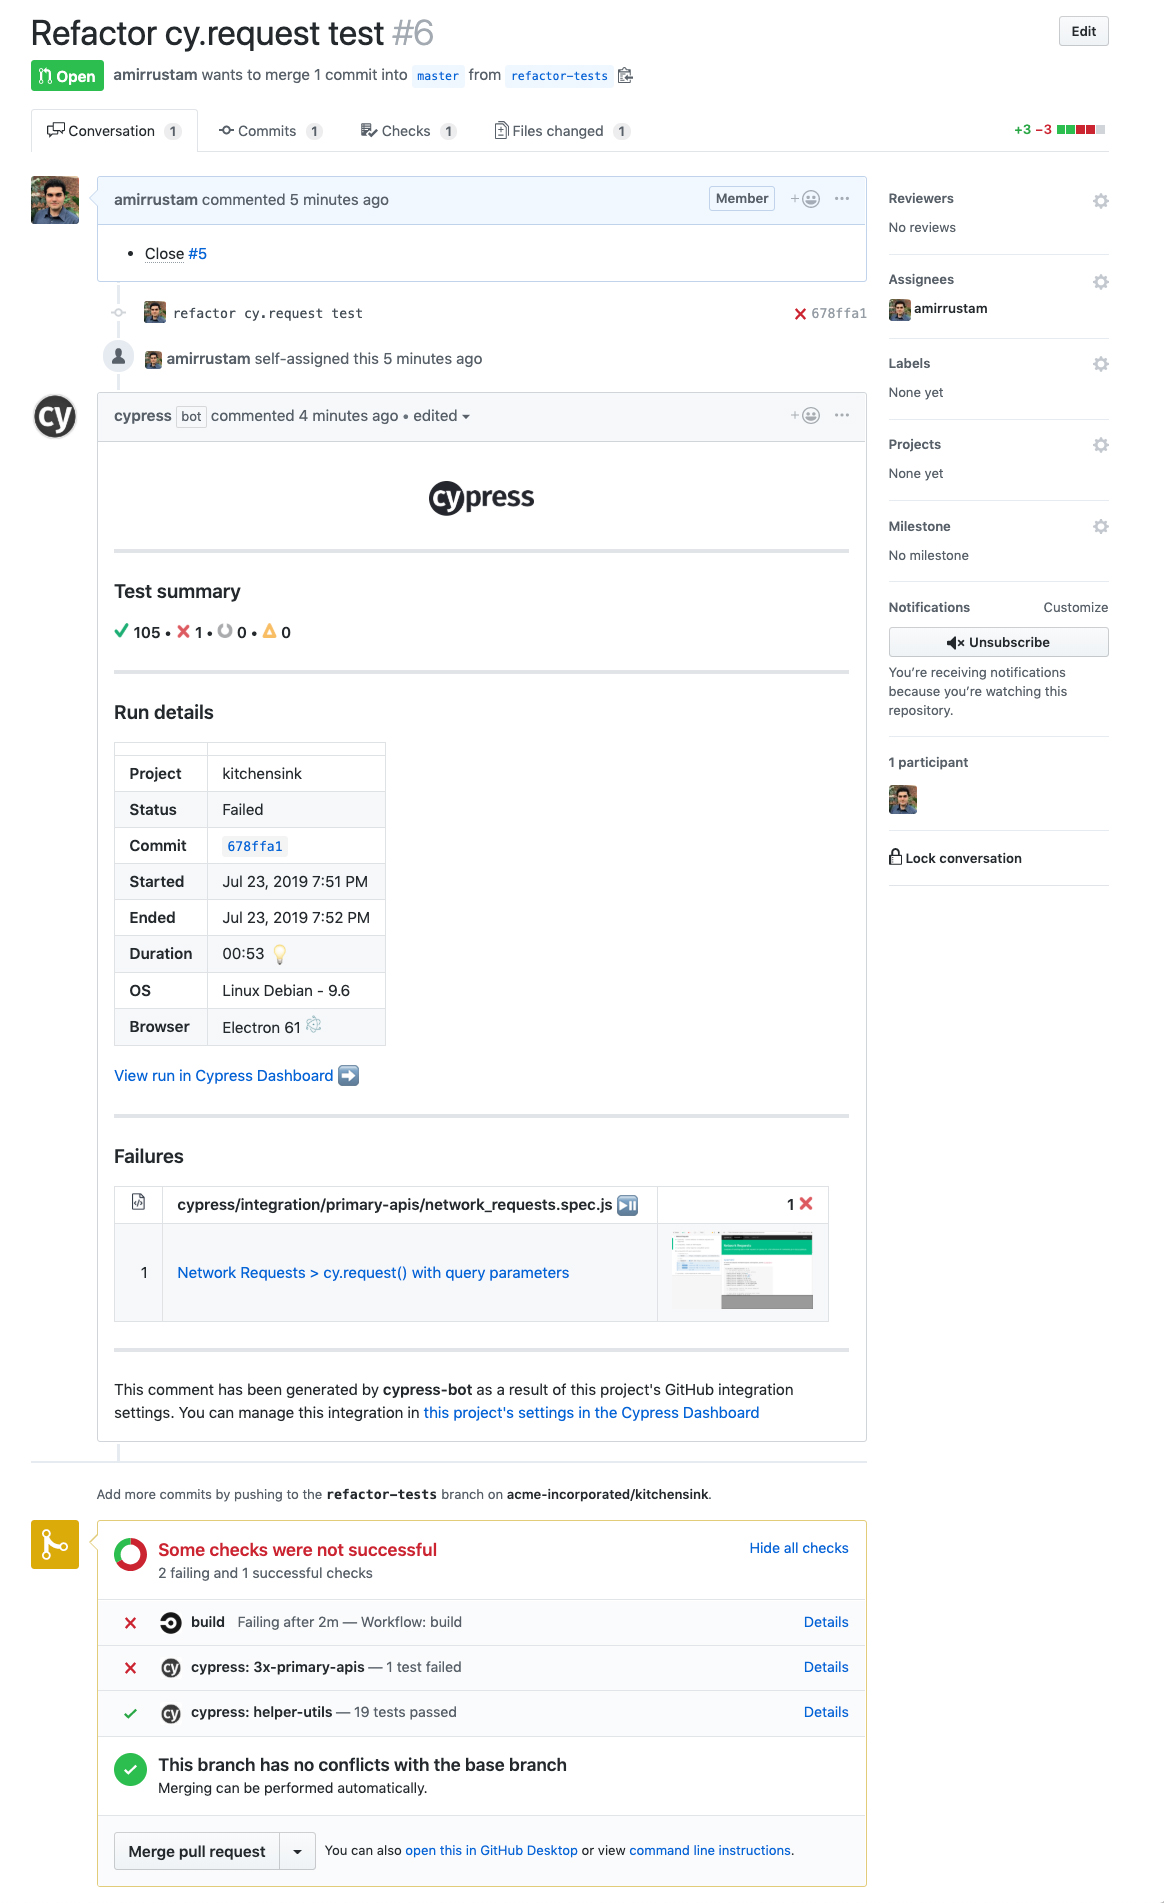
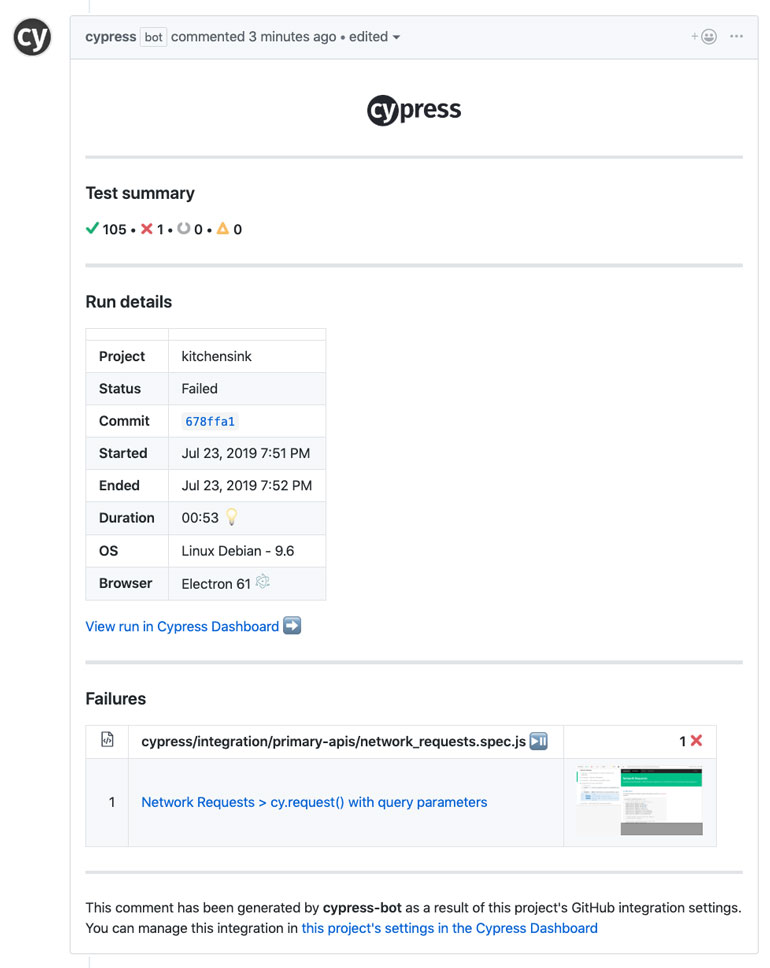
The Cypress GitHub App can provide detailed test information within pull requests via comments that include:
- Run statistics, such as tests passed, failed, skipped, and over-limit.
- Run context details:
- The associated Cypress project
- Final run status (passed, failed, etc)
- Commit SHA linking to the GitHub commit
- The time the run started and finished as well as the duration.
- Operating system version and browser version.
- Run failures:
- The first 10 failures are displayed with a link to more.
- Each failed test links back to the associated failure within the Cypress Dashboard.
- Screenshot thumbnails are also provided with each failure to conveniently provide context.
An example of a Cypress pull-request comment can be seen below:
Disable PR comments
PR comments and failure screenshot thumbnails are optional, and can be disabled
if not needed within a project's GitHub Integration settings:

Uninstall the Cypress GitHub app
You can uninstall the Cypress GitHub app from GitHub by performing the following steps:
- Go into your organization's Settings from within GitHub.
- Click on Installed GitHub Apps.
- Click Configure beside the Cypress app.
- Click Uninstall below the "Uninstall Cypress" section.